Lifesage Class Guide: Best Arts and Skills
Lifesage is a type of Healer class in Xenoblade Chronicles 3 and is the default class of Nia. Read on to learn more about the class, including its best arts, skills, characters, accessories, and gems, as well as find out how to unlock the class.
List of Contents
Lifesage Class Overview
Lifesage Basic Information
| Class | Role | Default Character | |
|---|---|---|---|
 Lifesage Lifesage
|
|
 Nia Nia
|
|
| Attack | Defense | Health | Support |
| S | D | B | S |
| Description | |||
| A Healer whose command of water can fell foes and heal allies in the same beat, a battlefield messiah. | |||
Character Class Rating
| Noah | Mio | Eunie |
|---|---|---|
| D | S | B |
| Taion | Lanz | Sena |
| B | A | C |
Class Rating is the speed at which each character ranks up an individual class, so the lower their Class Rating, the slower it takes for them to rank up the class.
How to Unlock Lifesage
Recruit Nia during the Post Game
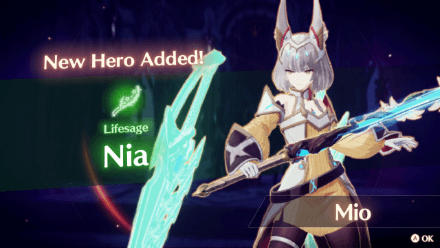
After completing the main story, return to Aetia Region, Upper in the Aetia Region and look for another quest related event on the west side of the map. Approach it and finish the cutscene to add Nia to your party and her Lifesage class.
How to Recruit Nia and Hero Rating
Best Lifesage Characters
| Recommended Characters | ||
|---|---|---|
 Mio Mio
|
 Eunie Eunie
|
 Lanz Lanz
|
Mio and Eunie's high Healing stats make them a great choice for the Lifesage class, particularly Mio, whose naturally high compatibility makes it easier for her to level up the class more easily. As a defender, Lanz can make good use of the Lifesage class, especially if you previously played him as a War Medic.
Best Lifesage Arts
Recommended Combat Arts
| Art | Attack Type | AoE | Base Effect |
|---|---|---|---|
 Redeeming Bloom Redeeming Bloom
|
Set Field | AOE around User | Field range of effect - medium |
 Redemption Redemption
|
Healing | AOE around User | None |
 Saber Slash Saber Slash
|
Ether Attack | One Target | Heals nearby allies when Art hits, to max of 100% of Healing Power. |
The Lifesage class has several excellent Healing Arts that can heal your allies in many ways. It is best to equip all of these Arts in your Art Palette to make you a more reliable Healer and Support character for your team.
Recommended Master Arts
Rank 1 and 10 Master Arts
| Art | Base Effect | Class Rank |
|---|---|---|
 Shadow Eye Shadow Eye
|
Aggro Halved / Atk. Up |
Rank 10 |
 Ether Cannon Ether Cannon
|
Accuracy Down |
Rank 10 |
 Energy Grenade Energy Grenade
|
Continuous dmg field |
Rank 1 |
Shadow Eye is a must for any Healer class, as it reduces aggro while you support your allies. Energy Granade and Ether Cannon not only proide you with excellent offensive potential, but they also inflict helpful debuffs.
If you decide to equip Energy Granade along with Redeeming Bloom, you must also equip All About Support as a Master Skill.
Rank 20 Master Arts
| Art | Base Effect | Class Rank |
|---|---|---|
 Soulfire Soulfire
|
Heal all on hit / Atk down |
Rank 20 |
Though Divine Sword is the superior Talent Art, Soulfire makes a decent alternative since it provides mostly the same effects, except it also inflicts Attack Down. If you prefer to inflict this debuff on enemies, then you can use it as your Talent Art.
Best Master Skills for Lifesage Builds
Rank 5 Master Skills
| Skill | Effect | Class Rank |
|---|---|---|
 Ninja Healer Ninja Healer
|
Reduces aggro generated from healing Arts by 30%. |
Rank 5 |
 Ethereal Ability Ethereal Ability
|
Boosts damage dealt by ether Arts by 30%. |
Rank 5 |
 All About Support All About Support
|
Increases the no. of Field Arts that can be set to the Arts Palette by 1. |
Rank 5 |
Similar to Shadow Eye, Ninja Healer reduces aggro while healing, making it an important skill for any Healer class. Since most of the offensive Arts in this class are Ether Attacks, Ethereal Abiity is also recommended.
All About Support is only necessary if you plan to equip more than one Field Art in your palette at once.
Rank 15 Master Skills
| Skill | Effect | Class Rank |
|---|---|---|
 Covert Attack Covert Attack
|
Reduces aggro generated from attacks by 20%. |
Rank 15 |
|
|
Increases field effect duration by 30%. |
Rank 15 |
Once you have access to a few Rank 15 Master Skils, the above Arts can replace some of the skills you already have. Eternal Formation is highly recommended as it increases the duration of your Field Arts.
Best Accessories for Lifesage Builds
| Boosted HP Healed from Healing Arts | Reduced Aggro from Healing Arts | Boosted Dexterity |
|---|---|---|
|
|
 Affection Ring Affection Ring
|
|
Any accessory that can improve your Lifesage's Healing or reduce aggro when healing is recommended. Increasing your character's Dexterity stat is also ideal as it allows their attacks to hit more often.
Best Gems for Lifesage Builds
| Improved Healing | Reduced Aggro from Arts | Added chance to strike twice per auto-attack |
|---|---|---|
 Lifebearer Lifebearer
|
 Disperse Bloodlust Disperse Bloodlust
|
 Doublestrike Doublestrike
|
Doublestrike increases the chance of auto-attacking twice per cycle, allowing you to recharge your Arts much more quickly and constantly provide support to your allies.
List of Lifesage Arts
Talent Arts
| Base Art Information | ||||
|---|---|---|---|---|
 Divine Sword Divine Sword
|
Area of Effect | One Target | Power Multiplier | 750% |
| Buff/ Debuff | - | Reaction | None | |
| Recharge Type | Role Action Recharge | Recharge Gauge | 5 | |
| Effect | Ignores enemy defense. Also heals all allies to a maximum of 150% of Healing Power. | |||
Combat Arts
| Base Art Information | ||||
|---|---|---|---|---|
 Redemption Redemption
|
Area of Effect | AOE around User | Power Multiplier | 165% |
| Buff/ Debuff | - | Reaction | None | |
| Recharge Type | Auto-Attack Recharge | Recharge Gauge | 5 | |
| Effect | None | |||
 Saber Slash Saber Slash
|
Area of Effect | One Target | Power Multiplier | 180% |
| Buff/ Debuff | - | Reaction | None | |
| Recharge Type | Auto-Attack Recharge | Recharge Gauge | 5 | |
| Effect | Heals nearby allies when Art hits, to max of 100% of Healing Power. | |||
 Hydro Blast Hydro Blast
|
Area of Effect | One Target | Power Multiplier | 270% |
| Buff/ Debuff | - | Reaction | Blowdown | |
| Recharge Type | Auto-Attack Recharge | Recharge Gauge | 7 | |
| Effect | 30% chance to ignore defense. | |||
 Aqua Mind Aqua Mind
|
Area of Effect | Self | Power Multiplier | 0% |
| Buff/ Debuff | - | Reaction | None | |
| Recharge Type | Auto-Attack Recharge | Recharge Gauge | 8 | |
| Effect | Continuously heals nearby allies' HP, boosts recharge speed by 25%. | |||
 Waterlily Waterlily
|
Area of Effect | AOE around User | Power Multiplier | 0% |
| Buff/ Debuff | Regenerate | Reaction | None | |
| Recharge Type | Auto-Attack Recharge | Recharge Gauge | 4 | |
| Effect | Field range of effect - small | |||
Master Arts
| Art | Rank Mastered |
|---|---|
 Hydro Blast Hydro Blast
|
1 |
 Aqua Mind Aqua Mind
|
10 |
 Divine Sword Divine Sword
|
20 |
Hero-Exclusive Arts
| Base Art Information | ||||
|---|---|---|---|---|
 Merciful Heart Merciful Heart
|
Area of Effect | Frontward AOE | Power Multiplier | 285% |
| Buff/ Debuff | - | Reaction | Knockback | |
| Recharge Type | Auto-Attack Recharge | Recharge Gauge | 7 | |
| Effect | None | |||
 Last Hope Last Hope
|
Area of Effect | One Target | Power Multiplier | 325% |
| Buff/ Debuff | - | Reaction | Blowdown | |
| Recharge Type | Auto-Attack Recharge | Recharge Gauge | 6 | |
| Effect | 40% chance to ignore defense. | |||
 Redeeming Bloom Redeeming Bloom
|
Area of Effect | AOE around User | Power Multiplier | 0% |
| Buff/ Debuff | Regeneration | Reaction | None | |
| Recharge Type | Auto-Attack Recharge | Recharge Gauge | 4 | |
| Effect | Field range of effect - medium | |||
Arts Guide: List of All Arts and Effects
List of Lifesage Skills
Class Skills
| Skill | Base Effect |
|---|---|
 Abundant Oceans Abundant Oceans
|
Reduces damage to allies by 10%, increases Healing by 10%. (The effect does not stack.) |
 Enhanced Cellular Stimulus Enhanced Cellular Stimulus
|
30% percent chance on hit to deal 100% of Healing Power as defense-bypassing damage. |
 Instant Regen+ Instant Regen+
|
25% chance to heal using 60% of Healing Power upon taking damage |
 Steadfast Feelings Steadfast Feelings
|
Restore nearby allies' HP when Art hits, equal to 30% of user's Healing |
Master Skills
| Skill | Rank Mastered |
|---|---|
 Enhanced Cellular Stimulus Enhanced Cellular Stimulus
|
5 |
 Abundant Oceans Abundant Oceans
|
15 |
Xenoblade Chronicles 3 Related Guides

All Attacker Classes
| List of Attacker Classes | ||
|---|---|---|
 Swordfighter Swordfighter |
 Ogre Ogre |
 Flash Fencer Flash Fencer |
 Yumsmith Yumsmith |
 Full Metal Jaguar Full Metal Jaguar |
 Stalker Stalker |
 Incursor Incursor |
 Soulhacker Soulhacker |
 Martial Artist Martial Artist |
 Seraph Seraph |
 Machine Assassin Machine Assassin |
 Royal Summoner Royal Summoner |
All Defender Classes
| List of Defender Classes | ||
|---|---|---|
 Zephyr Zephyr |
 Heavy Guard Heavy Guard |
 Guardian Commander Guardian Commander |
 Lone Exile Lone Exile |
 Lost Vanguard Lost Vanguard |
 Noponic Champion Noponic Champion |
All Healer Classes
| List of Healer Classes | ||
|---|---|---|
 Medic Gunner Medic Gunner |
 Tactician Tactician |
 War Medic War Medic |
 Thaumaturge Thaumaturge |
 Strategos Strategos |
 Signifer Signifer |
 Troubadour Troubadour |
 Lifesage Lifesage |
- |
Author
Lifesage Class Guide: Best Arts and Skills
Rankings
- We could not find the message board you were looking for.
Gaming News
Popular Games

Pokemon Legends: Z-A Walkthrough & Guides Wiki

Digimon Story: Time Stranger Walkthrough & Guides Wiki

Genshin Impact Walkthrough & Guides Wiki

Umamusume: Pretty Derby Walkthrough & Guides Wiki

Honkai: Star Rail Walkthrough & Guides Wiki

Wuthering Waves Walkthrough & Guides Wiki

Zenless Zone Zero Walkthrough & Guides Wiki

Pokemon TCG Pocket (PTCGP) Strategies & Guides Wiki

Borderlands 4 Walkthrough & Guides Wiki

Hollow Knight: Silksong Walkthrough & Guides Wiki
Recommended Games

Fire Emblem Heroes (FEH) Walkthrough & Guides Wiki

Yu-Gi-Oh! Master Duel Walkthrough & Guides Wiki

Once Human Walkthrough & Guides Wiki

Diablo 4: Vessel of Hatred Walkthrough & Guides Wiki

Persona 3 Reload Walkthrough & Guides Wiki

Super Smash Bros. Ultimate Walkthrough & Guides Wiki

The Legend of Zelda: Tears of the Kingdom Walkthrough & Guides Wiki

Black Myth: Wukong Walkthrough & Guides Wiki

Monster Hunter World Walkthrough & Guides Wiki

Elden Ring Shadow of the Erdtree Walkthrough & Guides Wiki
All rights reserved
© Nintendo / MONOLITHSOFT
The copyrights of videos of games used in our content and other intellectual property rights belong to the provider of the game.
The contents we provide on this site were created personally by members of the Game8 editorial department.
We refuse the right to reuse or repost content taken without our permission such as data or images to other sites.
